Tag Archives: halloween

Double Chocolate Pumpkin Cupcakes with Cream Cheese Frosting

Pumpkin Cupcakes

I found this recipe on Pinch My Salt and was very pleased with how it came out.

I was having a pumpkin carving party at my house, and of course wanted some pumpkin-inspired desserts to go along with the carving fest. I was drawn to this recipe because it was much healthier than traditional cake recipes: it uses no butter, less sugar, yogurt and therefore cuts down on the fat and empty calories that desserts usually have. I don’t usually try to make desserts healthier, but since it was already there, I figured I might as well try! Because the frosting is sweet, you don’t really miss the sugar. My boyfriend helped me make these the day of the party, and was concerned that they would be quite bitter after watching the brown sugar, cocoa and yogurt go into the bowl. However, they were great! Don’t expect them to have a significant pumpkin flavor, but there’s definitely a kick of something. Also, the recipe calls for mini chocolate chips, but I used regular ones and it was fine. Little ones might distribute better, though.

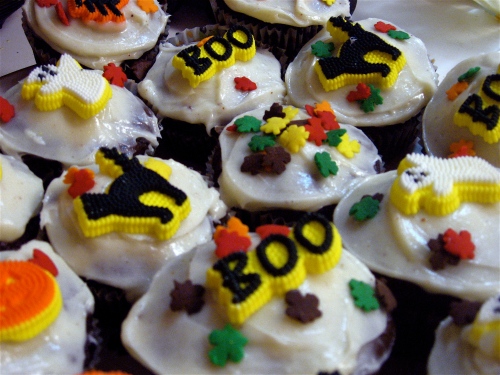
For the decorations, go nuts! My roommate saw some cute pre-made Halloween cake decorations a the grocery store and bought them for me, and they certainly made the cupcakes draw a lot of attention (even from the cats, who stole no less than 5 cupcakes throughout the course of the party – don’t worry, we caught them before they ate any).
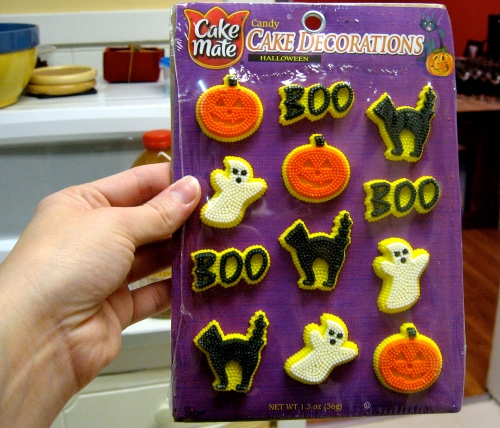
Decorations


They were a hit! Just in time for Halloween (and a snowy one here in Colorado!)


Double Chocolate Pumpkin Cupcakes

  • 1 1/2 cups cake flour
  • 2/3 cups cocoa powder
  • 2 tsp baking powder
  • 1 tsp baking soda
  • 1/2 tsp salt
  • 1 cups plain lowfat yogurt
  • 1 3/4 cups canned pumpkin (15 oz. can)
  • 1 tsp white vinegar
  • 2 tsp vanilla extract
  • 1/2 cups unsalted butter, softened
  • 1 1/2 cups lightly-packed light brown sugar
  • 3 large eggs
  • 1 cup mini chocolate chips
  • 1. Preheat oven to 350 degrees. Line 24 cupcake cups with paper liners.
  • 2. Sift the flour, cocoa, baking powder, baking soda and salt together; set aside. In a separate bowl, stir together the yogurt, pumpkin, vinegar, and vanilla extract, set aside.
  • 3. In a large mixing bowl, and using an electric mixer on medium speed, beat butter and brown sugar until light and fluffy. Beat in the eggs, one at a time. Alternately beat in the flour and pumpkin mixtures in thirds (for example, beat in 1/3 flour mixture followed by 1/3 pumpkin mixture and repeat until everything is combined). Fold in the mini chocolate chips.
  • 4. Working quickly, spoon batter into cupcake cups, filling each about 3/4 full. Place cupcake pans in the center of the preheated 350 degree oven and bake approximately 25 minutes. Cupcakes are done when they spring back when lightly touched or a toothpick inserted in the center comes out clean. Cool pans on wire racks for 10 minutes then remove cupcakes from pans and let cool completely on the wire racks.
  • 5. While cupcakes are cooling, prepare cream cheese frosting (recipe follows). When cupcakes are completely cool, spread with frosting.

Halloween Cream Cheese Frosting

  • 8 oz. cream cheese, softened
  • 1/4 cups unsalted butter, softened
  • 2 cups powdered sugar
  • 1/4. tsp vanilla extract
  • 1/8 tsp ground cinnamon
  • 1/8 tsp fresh ground nutmeg
  • In a medium bowl, beat together cream cheese, butter, powdered sugar, vanilla, cinnamon, and nutmeg. If frosting is too soft, chill in fridge for 15-20 minutes.

2 Comments

Filed under Recipes, Sweet Things

‘Tis the season: Candy Apples

I realized recently that I’ve never actually had a candy apple. Sure, I’ve seen them. And I’ve definitely had caramel apples, but I’ve never consumed a bright red apple with a candy shell. So my roommate and decided to have a pumpkin carving party at our house, and I decided to make candy apples for the occasion.

Candy can be a very intimidating thing to try to make. You need to have all the right equipment and everything adequately prepared beforehand, and you need to pay attention, because the instant it goes to the wrong temperature, everything can go amuck. (Amuck, amuck, amuck!, Ok, that word gets weird when you write it over and over again.) But, it’s really far simpler than it seems, and once you try it, you find you want to make more and more things!

So, you need a candy thermometer, a saucepan, popsicle sticks or wooden skewers, something to place the finished apples on (I recommend something flat, like a cookie sheet), aluminum foil (to put on the cookie sheet), pastry brush (to wipe away sugar crystals with warm water) and a wooden spoon. It is best to have all these things out and ready before you begin to make the candy so you’re not rushing at the last second.

Next, pick out some good apples. The firmer, the better. It’s also great to have tart apples to counteract the sweetness of the candy. I used Granny Smith, Gala and Honey Crisp. Many kinds would work, but I’ve heard that Red Delicious aren’t firm enough to make satisfactory candy apples. Choose wisely. It has also been recommended that if you use store-bought apples, flash-dip them in boiling water before making the candy to wipe away the wax coating, and then refrigerate them. I did not do this, and they turned out just fine, but next time, I will probably try this, or buy apples from a farmer’s market.

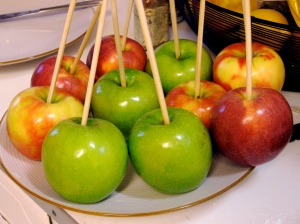
To make the apples, first rinse them, remove the stems and skewer them, like so.

Apples

Make sure the apples and the sheet to put them on when they’re done are easily reachable from the stovetop, to make the finish much smoother.

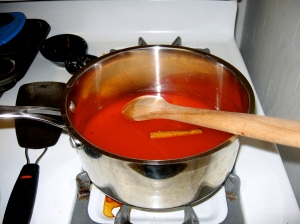
In a small/medium saucepan over medium to medium-high heat, dissolve 2 cups of sugar into 1/2  cup light corn syrup and 3/4 cup water. Add some red food coloring to reach the traditional color. I also added a cinnamon stick to the mixture to give a stronger flavor. Just let the cinnamon stick sit in there the whole time the candy boils and then remove before coating the apples. Do NOT remove with your fingers (Yes, I made that mistake). Tongs. Tongs are GREAT things. Plus, it’s hard to coat the apples and ice your finger at the same time.

Candy Apple Stage 1

Be sure to stir dissolve the sugar completely before letting the mixture boil, or you may get some crystallization. At this point, it wise to use the pastry brush to brush any stray sugar down the sides. The less crystallization, the smoother and better the candy.

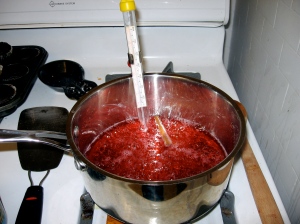
Bring the mixture to a boil and STOP STIRRING. Have the candy thermometer attached and ready before you boil. And then, just watch the thermometer.

Candy Apple Stage 2

The recipe I used recommended 290 degrees as an ending point. I would recommend a little lower or a little higher. As it was, the results were beautiful but very, very difficult to eat. A slightly harder, more brittle candy might be better (between 300 and 310, hard crack stage – you will need to cool the pan in a larger pan of cool water for this) or a softer candy might be better so it’s easier to chew. I’m not sure of an ideal temperature to cook the softer candy to – I’ll have to experiment and keep you posted. (My gut says maybe 250 degrees, or the firm ball stage, like caramel.)

If you DON’T have a candy thermometer, get one. However, if you can’t, you can use the cold water test to figure out when to stop.

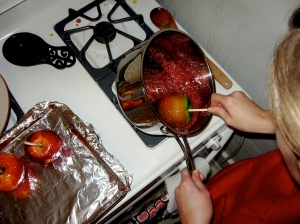
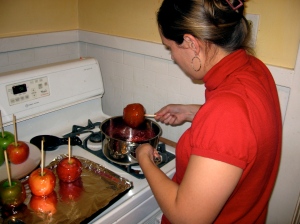
When the thermometer starts getting close to your desired temperature, keep your eye on it! Sugar is very temperature sensitive. When it hits the final temperature, immediately remove it from heat (gas ovens are convenient here) and start coating your apples, working quickly! Grab an apple, coat it in the mixture (tilting the pan or using a spoon are helpful here) and put the finished apple on the aluminum foil-coated pan. Continue.

Candy Apple Final 1

Candy Apple Final 2

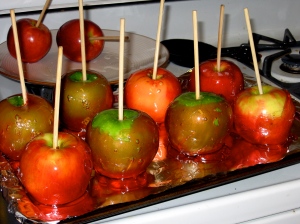
And soon, voila, you have some beautiful, sweet, candy apples. (Notice the last couple of apples here – the candy starts to thicken as it cools, and it becomes MUCH harder to coat the apples, this is why working quickly is important!)

Candy Apples Done

Happy Halloween season!

Candy Apples:

1/2 cup light corn syrup

2 cups sugar

3/4 cup water

1/2 tsp red food coloring

cinnamon stick (optional)

8 clean apples

Add ingredients to saucepan with a candy thermometer over medium-high heat. Allow sugar to dissolve and then bring to a boil, stopping any stirring once candy boils. Boil until it reaches 290 degrees, then immediately remove from heat. Coat apples one by one and place onto a coated tray or cookie sheet. Put apples in a refrigerator to cool. Eat within 3 days of making.

1 Comment

Filed under Recipes, Sweet Things